How to set up a webcam on the Neptune 4 Plus
0. Introduction
I searched the internet to find guides on how to set up a webcam on the Elegoo Neptune 4 Plus, but I only found them for the Neptune 4 Pro and they didn’t quite apply to this model. So I decided to write down the process I followed.
My printer is the Type-C version and runs the latest firmware to date (v1.4.1.4 - 2026.04.03). This guide will probably also work for the Neptune 4 Max as they are quite similar.
1. Prerequisites
I’m gonna assume that you already have an SSH client on your machine, and that you have connected the printer to your local network and know its IP address. If not, there are more detailed guides online on how to do this step.
We will need SSH and root access to the Linux machine running inside the printer. To do it, we need to enable root access from the touchscreen in the settings. The printer will also show the credentials to use, which will likely be:
- username:
neptune4 - password:
elegoo3dp
Then, we can log in with SSH using ssh neptune4@<ip-address> and enter the password.
After that, we will be inside the console of the printer’s SBC (MKS Pi).
2. Install video tools
Let’s start by installing the v4l2-ctl tool. This is needed to list and control video devices on Linux.
Unfortunately, the firmware I’m using is quite outdated (based on Debian Buster), so we need to update the apt sources list to be able to install the tool.
To edit it, we can run:
sudo nano /etc/apt/sources.list
We need to replace any references to deb.debian.org with archive.debian.org.
We can also comment out any security.debian.org lines, as they are not needed.
Then, we run:
sudo apt update  # to sync with the sources we just changed
sudo apt install v4l-utils  # to install v4l2-ctl
Now we have v4l2-ctl installed!
3. Find the webcam
For this step, we need to connect the webcam to the front USB-A port.
Now, we need to find where the webcam is located in the system so we can tell the system where to get the video feed from. First, list all connected video devices:
ls -lash /dev/v4l/by-id/*
Note that not all of them are actual webcams; some can be other virtual system devices.
So we need to inspect each of them with v4l2-ctl using the command v4l2-ctl -d /dev/v4l/by-id/<device-id> --all, where <device-id> is one of the video devices listed by the previous command.
We want to find one with a Card type value that resembles the webcam’s name and also includes a Format Video Capture section.
Take note of the webcam path (/dev/v4l/by-id/<device-id>) and its resolution, as we will need them later.
4. Create the config file
Now we need to create the config file for webcamd (the service responsible for streaming our webcam) if it’s not already present.
From the home directory, create the klipper_config folder with mkdir klipper_config.
Now open this link: spuder/klipper-ender2pro/webcam.txt
and copy the config to klipper_config/webcam.txt on the printer.
To open that file, use nano klipper_config/webcam.txt. If the file already exists, clear its contents before pasting.
Now we will need to set the following:
- Set
cameratousb - Uncomment
camera_usb_optionsand add the path to the webcam (-d /dev/v4l/by-id/<device-id>)
For example, this is how i configured my webcam:
camera="usb"
camera_usb_options="-d /dev/v4l/by-id/usb-Linux_Foundation_USB_Webcam_gadget-video-index0 -r 1920x1080 -f 10"
camera_streamer=mjpeg
If you want to further customize the resolution for the webcam feed, you can use this command to list all supported resolutions:
v4l2-ctl --list-formats-ext -d /dev/v4l/by-id/<device-id>. Just make sure to select one from under the MJPG section.
5. Start it
Now we have to start webcamd. To do so, run the following commands:
sudo systemctl enable webcamd
sudo systemctl restart webcamd
Next, we have to add it to Fluidd. Go to Settings, and under Webcam, add a new camera. Give it any name you want and save.
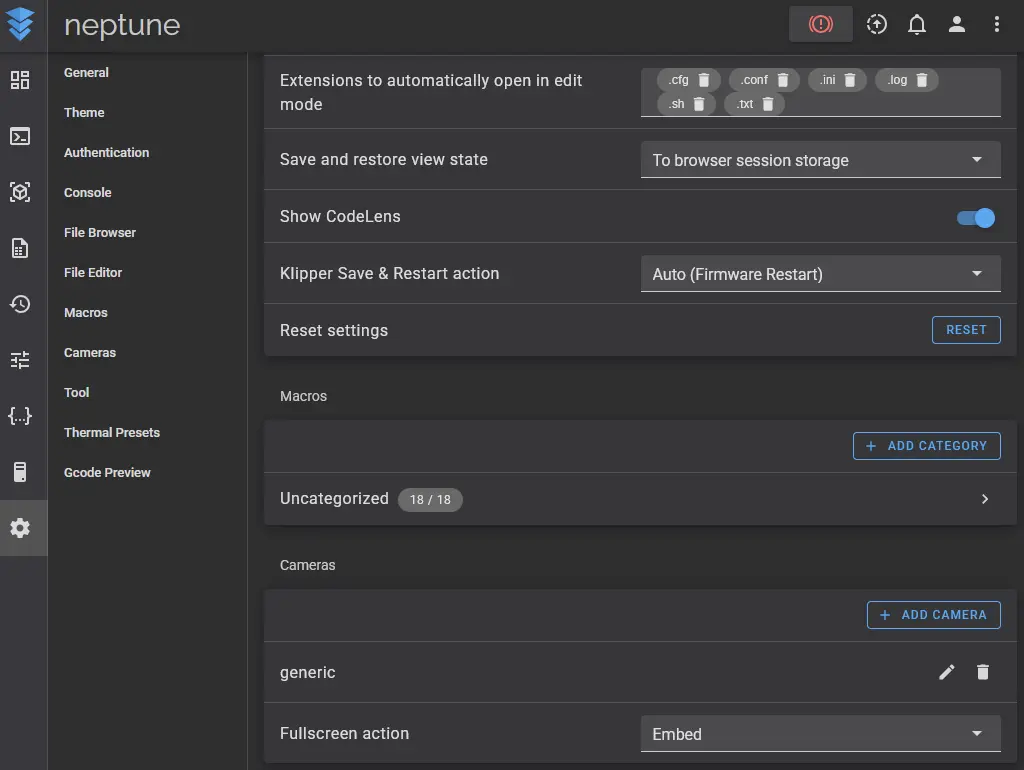
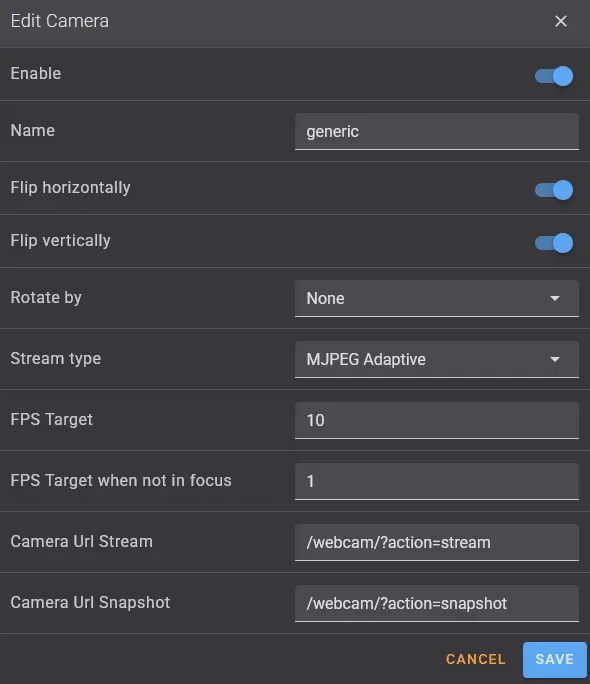
Success!
6. Conclusion
Now we have a working webcam on the printer! You can use Tailscale to remotely access the printer and check print progress on the go. Maybe in the future I’ll write another guide on how to set that up.
Also, here is a screenshot from my webcam:
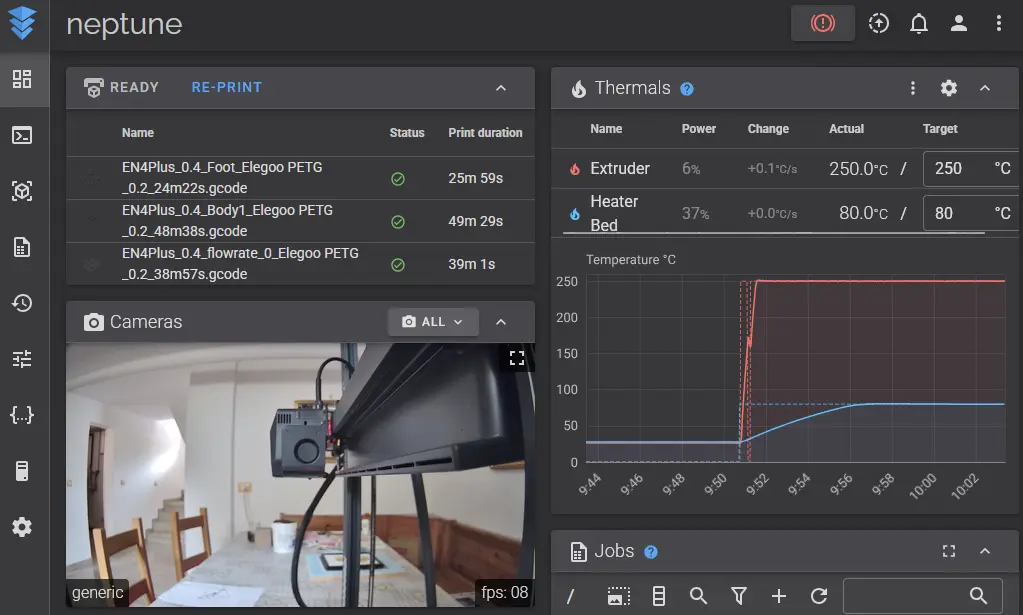
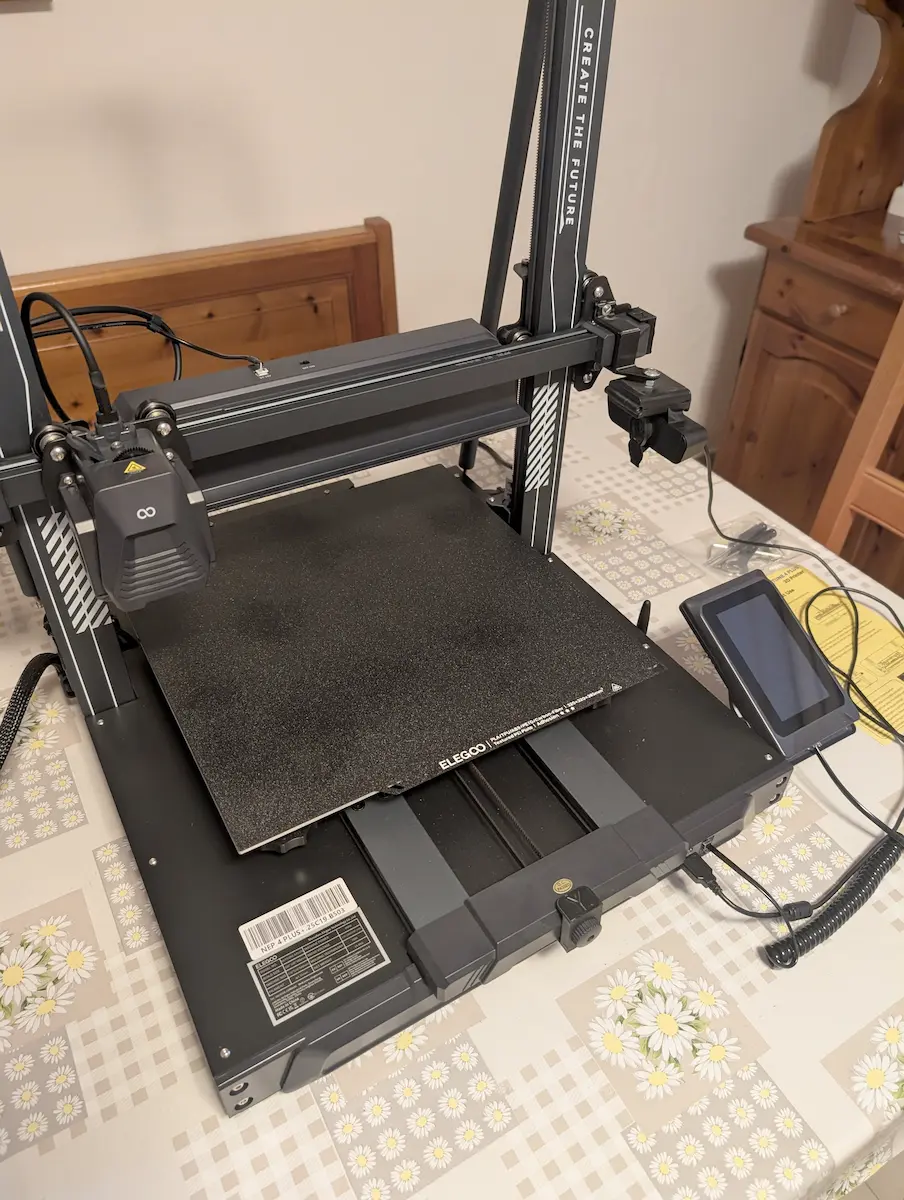
I used a generic webcam I had lying aroun. Its quality is pretty bad, but I can live with it. To mount it, I printed this model: https://www.thingiverse.com/thing:6463296 .
I hope this guide was helpful! Bye!